CSS Selectors & Custom Styling
Article Last Updated: March 4, 2021
The purpose of this article is to explain the different selectors (i.e. classes and IDs) that come out of the box with the Easy Forms plugin. At the end of the article, we’ll also give you a few different ways to add custom CSS to your site.
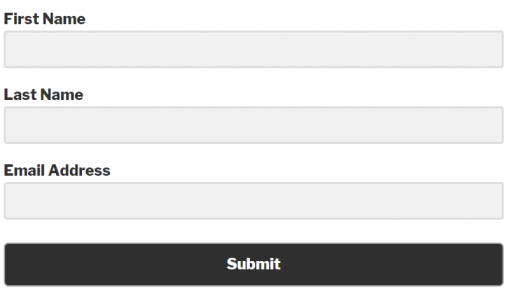
We’ll start by looking at a simple form with three fields: first name, last name, and email address.
If we inspect this form in the console (using the browsers debug tools, typically accessed through F12 or the settings menu), we can see the different selectors for the form, the fields, and the submit button.
Form
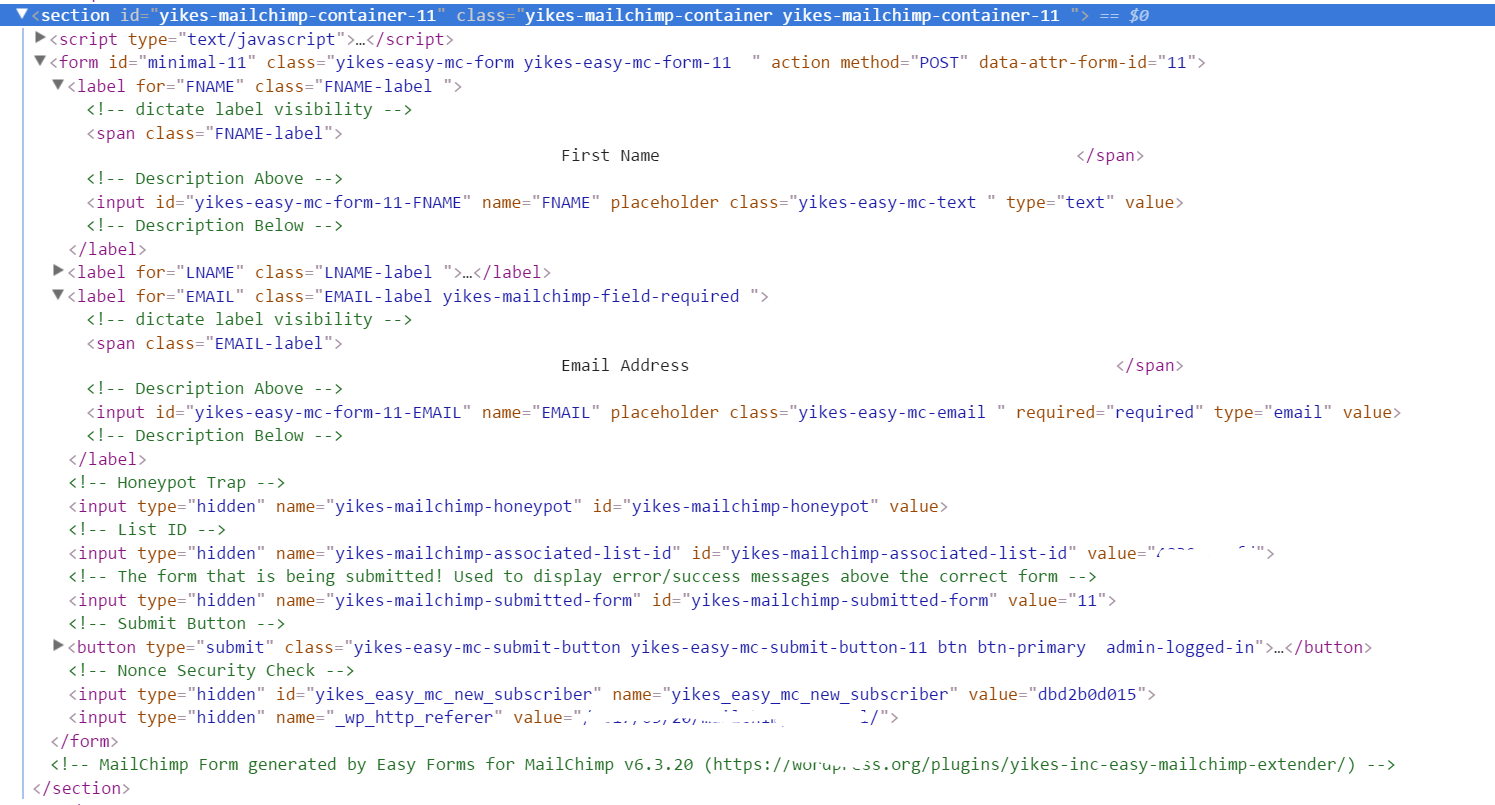
Every form is wrapped in a <section> tag, and will have the classes yikes-mailchimp-container and yikes-mailchimp-container-{$form_id}. The {$form_id} represents the ID of the form. You will see this convention used throughout the form. In this example, I am using form 11 so the class is yikes-mailchimp-container-11. You can find the ID of your form in many places, but the easiest is to look at the number your shortcode uses.
The form is then wrapped by a <form> tag, which will have the classes yikes-easy-mc-form and yikes-easy-mc-form-{$form_id}.
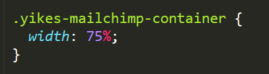
Example:
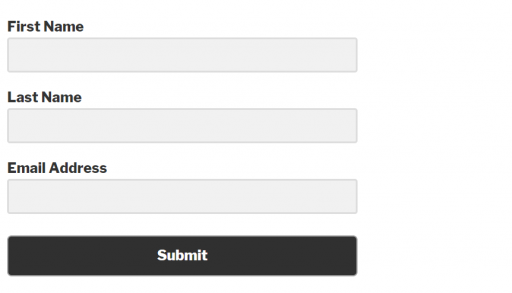
In this example I am setting the entire form’s width to 75% by targeting the top level <section> tag’s class.
Fields
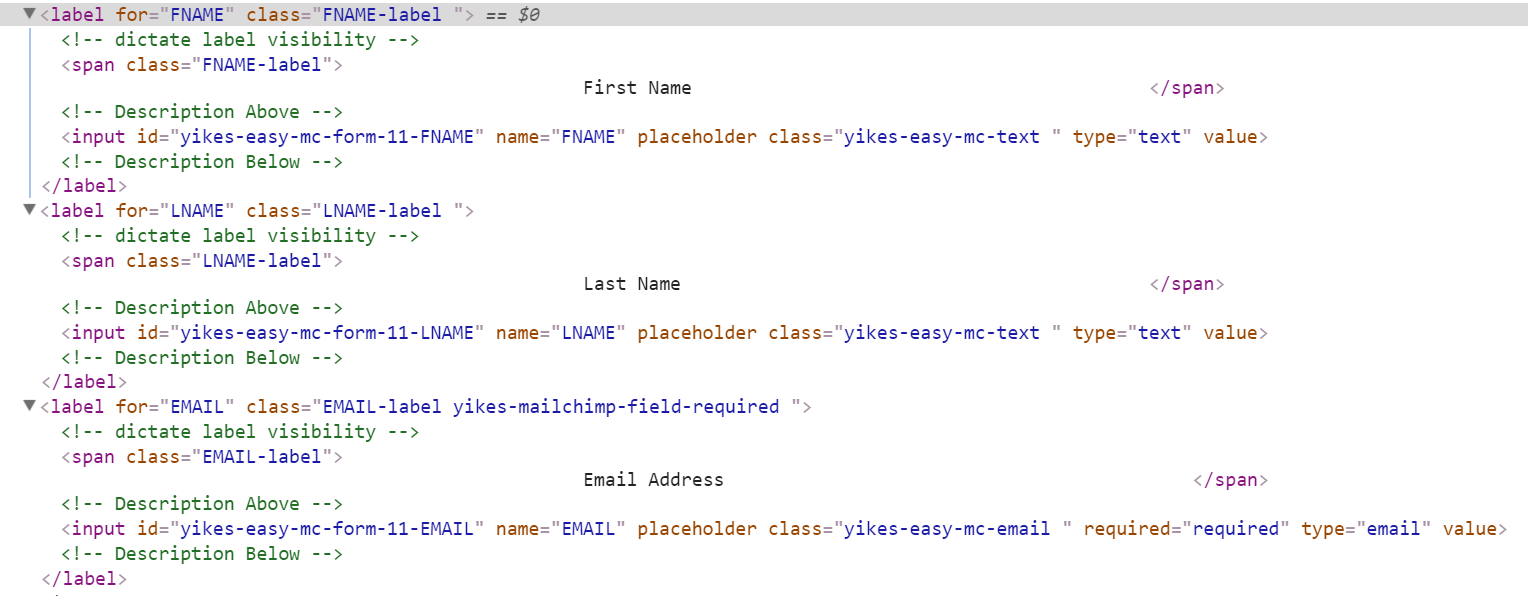
Each individual field is wrapped in a <label> tag, with the class {$merge_tag}-label.
If you’re not hiding the labels, the label text is within a <span> tag with the same class as the label, {$merge_tag}-label.
The actual field is an <input> tag with the following attributes:
- ID –
yikes-easy-mc-form-{$form_id}-{$merge_tag} - Class –
yikes-mc-easy-{$field_type}
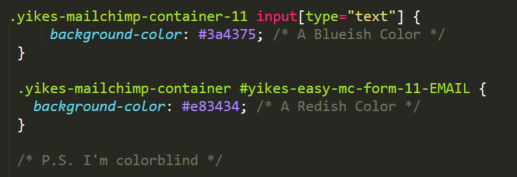
The field type is dependent on the type of field you’re working with. In this example, there are two: the first and last name fields are both of type text and the email field uses the type email. Thus, they have the classes yikes-mc-easy-text and yikes-easy-mc-email respectively.
Example:
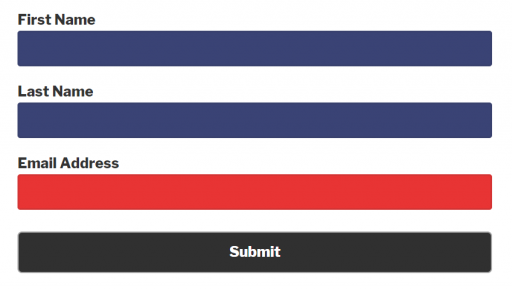
In this example I am setting the background color of the input fields with a type of text. You’ll see that this applies to both the first name and last name fields. I am also setting the email field’s background color by using it’s ID. You’ll notice I am adding my form’s selectors and then the input field’s selectors. This will make your styles more specific and help resolve conflicting styles.
Submit Button

The submit button is a <button> tag with the classes yikes-easy-mc-submit-button and yikes-easy-mc-submit-button-{$form_id}.
Example
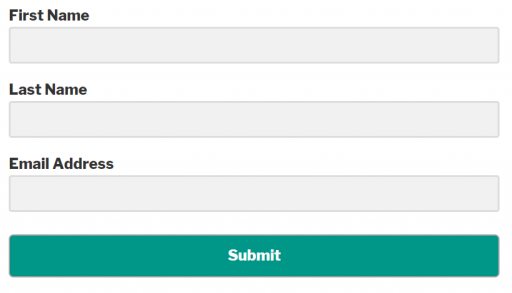
In this example I am simply using the <section> tag’s class and the submit button’s class to change the background color.

Note: you can add your own custom classes to your form and form fields by using the form builder (by opening up a field or going to the form settings), or use some filters.
How to Add Custom CSS
There are many ways to apply CSS to your site, here are a few:
- If you created this theme yourself, you can just add it to your style.css file
- If you’re using a theme you downloaded or bought you can make a child theme and add the code to your child theme’s style.css file
- You can use WordPress’ built-in customizer by going to Appearance -> Active Theme -> Customize and adding CSS to the Additional CSS field
- Your theme may have a “Custom CSS” option. If it does, then you can just pop it in there.
- You can use a plugin like Simple Custom CSS or Jetpack and enter the code in their
Also, we offer a customizer plugin that lets you change your form’s styles without editing any CSS (although it also comes with a custom CSS section where you can input your own styles).