Using Shortcodes
Article Last Updated: March 4, 2021
Shortcodes are used to add Mailchimp forms to pages and posts. Wherever you paste in an Easy Forms for Mailchimp Shortcode your form will appear.
How to Find Shortcodes
A forms’ Shortcode can be found on the Manage Forms list.
Hover over a form to reveal its options.
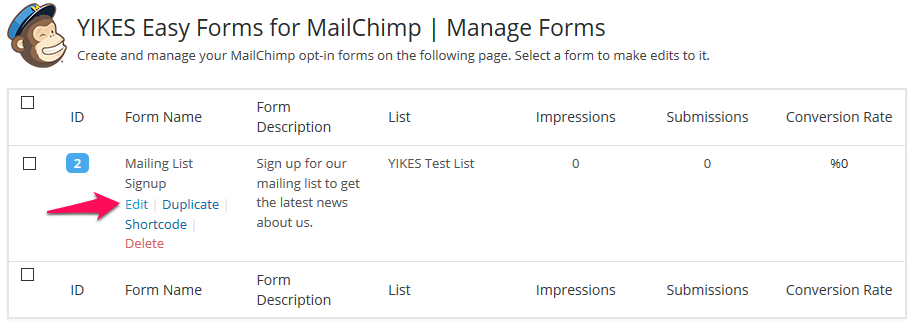
If you click on “Shortcode” the Shortcode will appear to the right.

You will also find the Shortcode under Form Settings

Shortcode Options
Form ID
Shortcodes use the form ID to determine which form to display.[yikes-mailchimp form="10"]
form=”10″ = display the form with an ID of 10. This is the only Shortcode variable that is required.
You can find the ID of a form on the Manage Forms list.
Display Title
If you want to display the title of your form above the form itself, add title="1" to the Shortcode. In this case “1” = true.[yikes-mailchimp form="1" title="1"]
Custom Title
If you want to override the form title set in the Form Builder, use custom_title.[yikes-mailchimp form="1" title="1" custom_title="This is my custom title"]
Note: title must be set to “1” for the custom title to display.
Display Description
If you want to display the description of your form above the form itself, add description="1" to the Shortcode. In this case “1” = true.[yikes-mailchimp form="1" title="1" description="1"]
Custom Description
If you want to override the form description set in the Form Builder, use custom_description.[yikes-mailchimp form="1" description="1" custom_description="This is a custom description"]
Note: title must be set to “1” for the custom title to display.
Custom Submit Button Text
If you want to change the text for the submit button, add your custom text to the shortcode using submit="Your Custom Text Here"[yikes-mailchimp form="1" submit="Sign Up!"]
Display Horizontal Form
If you want have your fields to have an inline, horizontal layout, use inline.[yikes-mailchimp form="1" inline="1"]
Turn on/off reCAPTCHA
If you want to turn the reCAPTCHA on or off on a per form basis use the recaptcha parameter. 1 = on / 0 = off.[yikes-mailchimp form="1" recaptcha="0"]
Note: You need to have reCAPTCHA enabled in settings for this to work.
Change reCAPTCHA Language
By default, the reCAPTCHA will be in the same language as your WordPress install. If you wish to override this use recaptcha_lang and enter in the 2 character language code.
In this example the language is set to Spanish.[yikes-mailchimp form="1" recaptcha_lang="es"]
We have several other reCAPTCHA shortcode options:
recaptcha_type– Set the type of reCaptcha this is. Options: Image or Audio. Default: Image.recaptcha_theme– Set the theme for this reCaptcha field. Options: Light or Dark. Default: Light.recaptcha_size– Toggle the size of this reCaptcha field. Options: Normal or Compact. Default: Normal. (Note: Compact is best for mobile devices)recaptcha_data_callback– Advanced – Fire off a custom JavaScript callback function when the user successfully checks off the reCaptcha field.recaptcha_expired_callback– Advanced – Fire off a custom JavaScript callback function when the reCaptcha field expires and needs to be refreshed.
Example
Here is an example shortcode with all of the possible recaptcha shortcodes being used.[yikes-mailchimp form="1" recaptcha="1" recaptcha_lang="fr" recaptcha_type="image" recaptcha_theme="dark" recaptcha_size="normal" recaptcha_data_callback="success_callback" recaptcha_expired_callback="expired_callback"]
Turn on Ajax
If you have Ajax set to no for your form and want to override this setting, use the ajax parameter, ajax=”1″[yikes-mailchimp form="1" ajax="1"]
Note: This does not work in the reverse.
Using Multiple Variables
You can use any combination of the above variables to a Shortcode – only the form ID is required.[yikes-mailchimp form="1" title="1" description="1" submit="Sign Up!"]
This will display form ID 1, with the title and description and the button will say “Sign Up!”